Showing posts with label build. Show all posts

Wednesday, December 23, 2015

OpenCV 3.1 with Java Support on OsX El Capitan V10.11.1

In this blog post I'll describe what you have to do in order to build OpenCV 3.1 with Java Support on a Mac with El Capitan.

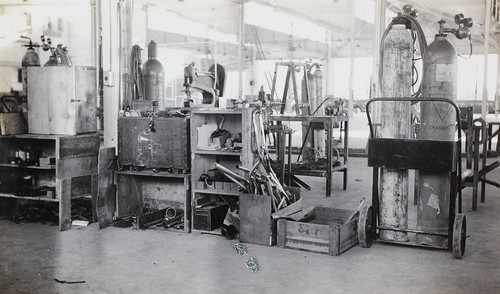
Painting the tanker 'Borgsten'


(If you don't want to do source builds and you don't have all necessary tools installed, there are also some alternatives like brew or macports available. In fact, I blogged about using this approach some years ago.)

Compiling OpenCV 3.1


First, you will have to download the sources directly from the official opencv.org site. It is a rather large source distribution, so the download may take a while.

Unpack the source ball into a directory, I did it like this:

~/opencv/ (1)
~/opencv/opencv-3.1.0/ (2)

I created a directory named "build"

~/opencv/build/ (3)

(1) ... a directory which includes all opencv versions, so you have everything in place if you want to follow more than one version and you don't use git for doing this
(2) ... the sources like you've downloaded them
(3) ... the build directory which will be cluttered up by cmake with all kinds of stuff

Change to the directory (3) and issue following command:

cmake ../opencv-3.1.0/

This command will investigate what is already installed on your system. It will do its best to download stuff it will need to compile what is possible. Certain tools or libraries you still need to download manually, though. This command will finish in a minute and end with a thorough report of how the build is configured. Check this list and see if your feature is configured aswell. To my surprise and as opposed to the last try with version 2.4.6 the java bindings are activated per default which is great. Huge thanks for the build guys of this library.

The cmake command is setup in a way that in theory you just have to invoke another command, named

make

which will invoke by itself all programs which contribute to the final build artifacts. This means it will invoke c++ compilers, c compilers, helper programs and whatnot. This command will also take some time to complete.

After waiting for some minutes the command exits successfully and in the bin folder there is a jar file which contains all bindings to the opencv library. This API is then the entrance for using the excellent library from your Java applications.

Using OpenCV 3.1.0 with Maven


After having compiled opencv like described above, several directories and files had been created. Amongst those, in the 'bin' folder, there is a file called

opencv-310.jar

This jar file can be installed in the local maven repository like this:

mvn install:install-file 
       -Dfile=opencv-310.jar 
    -DgroupId=org.opencv 
 -DartifactId=opencv-java 
    -Dversion=3.1.0 
  -Dpackaging=jar

From now on you should be able to reference the library with maven in the pom.xml like this:

<dependency>
  <groupId>org.opencv</groupId>
  <artifactId>opencv-java</artifactId>
  <version>3.1.0</version>
</dependency>

Still, in order to get OpenCV to work, you'll need the native part of the library which contains "the real thing" - the Java code is just a thin wrapper which makes it more convenient to call the native code. Those files are generated in the "lib" folder:

libopencv_objdetect.3.1.0.dylib
libopencv_calib3d.3.1.0.dylib
libopencv_objdetect.3.1.dylib
libopencv_calib3d.3.1.dylib
...

One of them is called "libopencv_java310.so" - this library contains the native code for the api which is accessible through the jar file. Make sure this library is loaded before you call the first time into the jar file via 

System.load(new File("/path/to/libopencv_java310.so"))

This should help you start developing against the OpenCV API with Java and MacOsX.

It may happen however, like mentioned, that you will need to install additional software packages such that the compilation step of OpenCV is successful for you.

Wednesday, July 2, 2014

Akka 2.3.4 and Scala 2.11.1 - on Android

This post outlines what is necessary to set up a Maven project to deploy a Scala application which utilizes Akka to Android.


Is Akka not a server framework?

Well, it is. I just wanted to see if I could manage to come up with a configuration for Maven and its Android plugin - not to forget the wonder tool every Android developer is always very happy to configure - Proguard :)

Besides, there are also others who want to get it to run on the mobile devices or did it already.

Why Scala on Android? Maven???

I do a little bit of Android programming also in my spare time, I even <shameless plug>created an app which you definitely should check out</shameless plug>, albeit I'm not using Akka for this one.
You can tell by reading my blog that I'm struggling with Maven on a daily basis - that is why I gave it a shot (because of work/life balance you know.)

I know that the 'normal' way to build scala projects is to "use the sbt", and like others  I do use it for some projects successfully. Sometimes however Maven is just ... here.

If you have the choice you should check out sbt and one of the android plugins available. The  proguard step is mandatory in the presented setup, without it it won't work. You can ease the pain of waiting for the proguard step to finish a little bit by tweaking the proguard configuration file and comment out the optimization steps.

If you still want to do it with Maven, read on or jump directly to the source on github.

Prerequisites

For this project, I used the exciting maven-android-sdk-deployer project which deploys everything you need in your local maven repository. Just follow the installation instructions on the project website.

Macroid Akka Fragments

An important piece in the puzzle is also the macroid project - check it out. For the example project I've stolen borrowed some code from the macroid-akka-fragment project which provides the necessary glue code for Akka.

In order to compile the example project, you don't need to do anything, the links were provided for reference.

Some remarks on the pom

Have a look at the configuration of the scala-maven-plugin in the project pom.xml - there are some interesting flags which enable various warnings/features for the scala compiler which help you write more correct code. See this blog post for more details.

In my opinion, the most precious thing about the whole post is the proguard configuration file. In my experience, it is quite cumbersome to come up with a working proguard configuration.

Rant: The typical user experience is that in the first few minutes you hunt for an "optimal" proguard file, after fiddling around for some hours you'll turn of all warnings and stick to the first "working" configuration.

Finally ... I get a compile error.

The maven configuration for the scala plugin is set to "incremental" - This incremental mode only works if the zinc server is also running. That means you have to start it via "zinc -start" once. I used zinc 0.3.5-SNAPSHOT for the compilation.

In theory, after cloning the repository from here and after entering

mvn clean package android:deploy

You should see something similar like this:

[INFO] --- scala-maven-plugin:3.1.6:compile (default) @ android-akka ---
[INFO] Using zinc server for incremental compilation

[info] Compiling 2 Scala sources and 2 Java sources to /Users/lad/temp/android-akka/target/classes...

- dont forget to connect your android device and activate the usb debugging mode

The app will look like this:

screenshot of the app (created with genymotion, a great android emulator!)
The app doesn't do anything interesting - it uses just one Actor (and one button), but it could serve as a start project for your own experiments with Akka, Scala, Maven and Android.

Thanks for reading!

Thursday, April 4, 2013

OpenCV on MacOSX - with Java support

You surely know that OpenCV has now first class java support since version 2.4.4. What you may not know is that literally since yesterday it is quite easy to install it on MacOsX, given that you use MacPorts.


Factory Floor
Factory Floor

box:lad$ sudo port selfupdate
Password:
--->  Updating MacPorts base sources using rsync
MacPorts base version 2.1.3 installed,
MacPorts base version 2.1.3 downloaded.
--->  Updating the ports tree
--->  MacPorts base is already the latest version

The ports tree has been updated. To upgrade your installed ports, you should run
  port upgrade outdated
box:lad$ sudo port install opencv +java
--->  Computing dependencies for opencv
--->  Dependencies to be installed: apache-ant cmake pkgconfig
--->  Fetching archive for apache-ant
--->  Attempting to fetch apache-ant-1.9.0_0.darwin_12.noarch.tbz2 from http://lil.fr.packages.macports.org/apache-ant
--->  Attempting to fetch apache-ant-1.9.0_0.darwin_12.noarch.tbz2.rmd160 from http://lil.fr.packages.macports.org/apache-ant
--->  Installing apache-ant @1.9.0_0
--->  Activating apache-ant @1.9.0_0
--->  Cleaning apache-ant
--->  Fetching archive for cmake
--->  Attempting to fetch cmake-2.8.10_1.darwin_12.x86_64.tbz2 from http://lil.fr.packages.macports.org/cmake
--->  Attempting to fetch cmake-2.8.10_1.darwin_12.x86_64.tbz2.rmd160 from http://lil.fr.packages.macports.org/cmake
--->  Installing cmake @2.8.10_1
--->  Activating cmake @2.8.10_1
--->  Cleaning cmake
--->  Fetching archive for pkgconfig
--->  Attempting to fetch pkgconfig-0.27.1_2.darwin_12.x86_64.tbz2 from http://lil.fr.packages.macports.org/pkgconfig
--->  Attempting to fetch pkgconfig-0.27.1_2.darwin_12.x86_64.tbz2.rmd160 from http://lil.fr.packages.macports.org/pkgconfig
--->  Installing pkgconfig @0.27.1_2
--->  Activating pkgconfig @0.27.1_2
--->  Cleaning pkgconfig
--->  Fetching archive for opencv
--->  Attempting to fetch opencv-2.4.4_3+java.darwin_12.x86_64.tbz2 from http://lil.fr.packages.macports.org/opencv
--->  Attempting to fetch opencv-2.4.4_3+java.darwin_12.x86_64.tbz2 from http://mse.uk.packages.macports.org/sites/packages.macports.org/opencv
--->  Attempting to fetch opencv-2.4.4_3+java.darwin_12.x86_64.tbz2 from http://packages.macports.org/opencv
--->  Fetching distfiles for opencv
--->  Attempting to fetch OpenCV-2.4.4a.tar.bz2 from http://ignum.dl.sourceforge.net/project/opencvlibrary/opencv-unix/2.4.4
--->  Verifying checksum(s) for opencv
--->  Extracting opencv
--->  Applying patches to opencv
--->  Configuring opencv
--->  Building opencv
--->  Staging opencv into destroot
--->  Installing opencv @2.4.4_3+java
--->  Deactivating opencv @2.4.4_2
--->  Cleaning opencv
--->  Activating opencv @2.4.4_3+java
--->  Cleaning opencv
--->  Updating database of binaries: 100.0%
--->  Scanning binaries for linking errors: 100.0%
--->  No broken files found.
box:lad$ port contents opencv | grep java
  /opt/local/share/OpenCV/java/libopencv_java244.dylib
  /opt/local/share/OpenCV/java/opencv-244.jar
box:lad$ 

Some Scala code to use it:


Many thanks to Andrew Stromnov to make this possible, since compiling yourself OpenCV with Java Support is not something the average Java guy will do. (I did it. It was a pleasure. ;-) )


Update:


Keep in mind that the port command compiles the jar file with the currently available JDK. If you run the port command in verbose mode you'll see that the jar file is assembled using ant. In order to force the port command to use a certain JDK you can patch the ant script:

 80 # OS specific support.  $var _must_ be set to either true or false.
 81 cygwin=false;
 82 darwin=false;
 83 mingw=false;
 84 case "`uname`" in
 85   CYGWIN*) cygwin=true ;;
 86   Darwin*) darwin=true
 87            if [ -z "$JAVA_HOME" ] ; then
 88                if [ -x '/usr/libexec/java_home' ] ; then
 89                    JAVA_HOME=`/usr/libexec/java_home -v 1.7`
 90                elif [ -d "/System/Library/Frameworks/JavaVM.framework/Versions/CurrentJDK/Home" ]; then
 91                    JAVA_HOME=/System/Library/Frameworks/JavaVM.framework/Versions/CurrentJDK/Home
 92                fi
 93            fi
 94            ;;
 95   MINGW*) mingw=true ;;
 96 esac

Like this, the JDK 1.7 on my machine will be used for generating the jar file. 

Friday, January 4, 2013

Compile OpenJFX RT on MacOsX

This time I want to describe what was necessary for me to compile the OpenJFX Project on my laptop, a MacBook Pro running Mountain Lion.
Quoting from the page:
As you can imagine, building a UI toolkit for many different platforms is quite complex. It requires platform specific tools such as C compilers as well as portable tools like ant. The build and project structure of JavaFX like most large projects has evolved over time and is constantly being revised.

I'm writing this early January 2013, maybe things will change in the future. I would love to see a mavenized build for OpenJFX, or even for the whole JDK which would increase adoption tremendously for the whole OpenJDK in my opinion.   

Step 1 to 10 - Checkout the source and do the rest

Mercurial, java, and ant should be installed, then the getting started guide gives you following recipe:

Here is the recipe for building OpenJFX (use a Cygwin shell on Windows):

  • Download the latest JavaFX Developer Preview binary
  • Unzip the binary and put it in ~/closed-jfx
  • mkdir -p ~/open-jfx
  • cd ~/open-jfx
  • hg clone http://hg.openjdk.java.net/openjfx/2.1/master
  • cd master
  • mkdir -p artifacts/sdk/rt
  • cp -r ~/closed-jfx/javafx-sdk2.1.0-beta/rt artifacts/sdk
  • hg clone http://hg.openjdk.java.net/openjfx/2.1/master/rt
  • cd rt
  • Edit build-defs.xml (comment out '<propertycopy name="javac.debuglevel" from="${ant.project.name}.javac.debuglevel" silent="true" override="true"/>')
  • cd javafx-ui-controls
  • ant
..... One hour later: I've followed those instructions, but got in trouble with step one (bravely continued with step 2, though). Searched for a macos binary (didn't know what to search for really?). Decided to go on. Sadly enough, I got stuck some time later with compile errors (Abstract methods not implemented by ... ?! well - this was rather strange.)

But ...


Just before giving it up, I've found after some googling the website of Peter Pilgrim, who just briefly mentioned that the getting started guide was somewhat outdated and after following his instructions I happily compiled openjfx the first time on my laptop!

For further reference, here are the necessary steps to compile OpenJFX:

mkdir openjfx-2.2/
cd openjfx-2.2/
hg clone http://hg.openjdk.java.net/openjfx/2.2/master
cd master
mkdir -p artifacts/sdk/rt/lib
cp $JAVA_HOME/jre/lib/jfxrt.jar artifacts/sdk/rt/lib
hg clone http://hg.openjdk.java.net/openjfx/2.2/master/rt
cd rt
-> edit common.properties, set property javac.debuglevel=lines,vars,source
ant clean dist


The story doesn't end here, in fact I've discovered that there are already efforts on mavenizing openjfx, at least I've found a pom.xml in the rt subdirectory.

With
hg log pom.xml
I've found out that in RT-19825 Adam Bien contributed those pom files.

After commenting the system dependency for the jfxrt.jar (since I've copied the jfxrt.jar into the jre/lib/ext directory by using zonskis maven fix classpath plugin) it happily compiled (by skipping the tests ) using following command :

mvn clean package -Dmaven.test.skip

(Disclaimer: I don't know if the maven build does the same as the ant build does - after inital commit those files seem to be untouched.)

Bottom line for me is that building/compiling (parts of/all of??) OpenJFX was easier than expected. Although I'm sure that this is not the end of the story. I would suspect that the native stuff wasn't compiled?! At least in the 'rt' directory there are only java sources...

The answer to this seems to be that this was only a small part of OpenFX. If you look at the Mercurial index page there are lots of different versions and components for OpenFX:


As you can see, I was only in one sub module of the whole game, but I hope you got the idea how to check out and build the project - it is as simple as described above!

For example, have a look in the openjfx 2.2.6 development:


mkdir openjfx-2.2.6/
cd openjfx-2.2.6/
hg clone http://hg.openjdk.java.net/openjfx/2.2.6/master
cd master
mkdir -p artifacts/sdk/rt/lib
cp $JAVA_HOME/jre/lib/jfxrt.jar artifacts/sdk/rt/lib
hg clone http://hg.openjdk.java.net/openjfx/2.2.6/master/rt
cd rt
-> edit common.properties, set property javac.debuglevel=lines,vars,source
ant clean dist

For the JDK8 branch the procedure works as described, but make sure you set your path to a JDK8. You could of course compile this also from source, but it's maybe easier to get a full JDK8 early access build from here.


ant clean dist for OpenFX-8 (in green)

Small update:

Only recently the structure of the repositories was explained a little bit, quoting Kevin Rushforth:

Each of the following should be treated as a separate forest. You would only grab one of these forests depending on which one you want.
1. The controls team forest:
openjfx/8/controls   openjfx/8/controls/rt   openjfx/8/controls/tests
2. The graphics team forest:
openjfx/8/graphics   openjfx/8/graphics/rt   openjfx/8/graphics/tests
3. The master forest:
openjfx/8/master   openjfx/8/master/rt   openjfx/8/master/tests
The team forests is where the work happens. Each team integrates into the master forest regularly (typically weekly).

Update February 2013:


Note: This tutorial was written early 2013, maybe in the meantime things have changed. There are efforts going on to restructure the build using gradle scripts, so maybe things have changed. This wiki page should be up to date and reflecting the current status of the build.

Have also a look at this video (after reading the whole blog post ;-) on how to do it:


This video shows that compiling JavaFX from source is just some clicks away. 

Sunday, December 30, 2012

Scala JavaFX Archetype

The scala-javafx-archetype helps you set up an environment for coding JavaFX with Scala.

Waiting at The Stairs
Waiting at The Stairs von aalfath bei Flickr
Last week I've published an archetype for maven to generate a simple maven project using Scala and JavaFX on GitHub.

In my opinion it is most important to have such gadgets to ease the burden of setting up an environment to start coding. I know from myself that you'll quickly lose interest in exploring a technology (at least in your sparetime ;-) ) if you have to solve a plethora of things before you actually come to the point which interests you.

There are also other archetypes which do roughly the same, like the one of Schlichtherle IT Services. In its latest version it uses still Scala 2.8.2 and JDK 1.6, which is not what I wanted. Looking at the generated pom, it uses also Scalacheck which I didn't need and old versions of the scala-maven-plugin.

Besides in the meantime, Daniel Zwolenski released a great maven plugin for building JavaFX applications which I wanted to support.

Thirdly, I just wanted to know how to get a maven artifact to the central repository. Being (among other things) a 10y+ Java developer, it just amazes me how some projects bootstrap themselves just by calling mvn package at the right time and the right place.


Thus my decision to implement this Hello World archetype, which, by the way, took less time than to write this blog post.

In hindsight, to my surprise, the process of getting into maven central was not really that hard, although you have to know quite some stuff and should have at least a glimpse of an idea what all related technologies are good for.

Alors ...

What is a maven archetype?

In short, Archetype is a Maven project templating toolkit. An archetype is defined as an original pattern or model from which all other things of the same kind are made. The names fits as we are trying to provide a system that provides a consistent means of generating Maven projects. Archetype will help authors create Maven project templates for users, and provides users with the means to generate parameterized versions of those project templates.
For a thorough explanation see the introduction documentation on the original apache site. 

Just a little warning: The documentation on maven is fragmented, there are bits and pieces written from different authors for different versions of the maven product itself. As such, in my opinion, it is sometimes confusing and harder than it should be to follow the main point. 

On the other hand it is a hard problem to provide good documentation, maybe you can contribute

How to create an archetype?


You can do it the hard way (and maybe you should do it at least once to learn) like described here, but in the meantime the awesome maven guys provided a tooling to generate a maven archetype project out of existing ones. 

That means if you have your maven project already set up, it is a piece of cake to create an archetype project. The magic spell is  mvn archetype:create-from-project.

I would advise you to try out this command and look into the target/generated-sources/.
You'll discover that even creating an archetype is almost for free. More information on that stuff is provided here.

Keep in mind that you will have to have at least two pom.xml, one for your artifact (your template) and one for the archetype itself. Those two poms will have different responsibilities and hence different dependencies, parents and so on. Tip:  create first a properly working prototype of your template, and only then start to "archetype" it. Typically, your archetype's pom will be rather simple, whilst the pom of your template project can be very complex.

You can provide your own parameters and do lots of things to parameterize your archetype, but this is out of scope for now.

How to get my open source project into Maven Central?


Archetypes are deployed like any other artifact in the central repository, there is no special difference to pay attention to. That means you should follow the guide to releasing artifacts in maven central.

In short, you just have to create an account on the sonatype nexus service and configure your settings.xml and your pom with a fixed parent. By "extending" the Sonatype OSS Parent POM you'll get magically everything you need to publish your project to public available Snapshot and Release Repositories.

For example, if you want to publish a Snapshot version of your application, a simple mvn deploy suffices.

To publish a release, you have to enter three commands:

  • mvn release:clean
  • mvn release:prepare
  • mvn release:perform

After that, there is some manual step (which can also be automated) and then your artifact will be hosted on Maven Central, which means that for every maven user on the world your library is readily available by providing your groupId, artifactid and version number.

But wait - where is JavaFX here?


Neither JavaFX nor Scala have anything to do with maven archetypes or deploying artifacts to maven central. You could write an artifact for your next great project idea using your favorite technologies, just like I did for the scala-javafx-archetype.

This archetype sets up a properly configured maven project using Scala and JavaFX, to try yourself you need a recent JDK and maven installed. Moreover you will need the JavaFX libraries in your classpath, with JDK8 this will be the default.

If this applies to you, you can jumpstart into JavaFX development with Scala by entering the following in your command line:

mvn archetype:generate -DarchetypeGroupId=net.ladstatt -DarchetypeArtifactId=scala-javafx-archetype -DarchetypeVersion=0.1

For more information visit the github repository.

Wednesday, August 29, 2012

Using Proguard for JDK 1.7 with Maven


Given that you have following scenario:
The Reader at Palais des Congres
photo by Tim Cooper
  • a project based on a  maven build
  • using the proguard plugin
  • with jdk 1.6

and you want to upgrade to jdk 1.7 for whatever reasons (maybe this one), you may encounter following problem:

 [proguard] Error: Can't read [/Library/Java/JavaVirtualMachines/jdk1.7.0_06.jdk/Contents/Home/jre/lib/rt.jar] (Can't process class [WrapperGenerator$1.class] (Unsupported version number [51.0] for class format))

It seems like proguard has some problems with the class version number.

Great. What to do? Why me? Again?

After some googling you'll start to wonder why the proguard maven plugin uses an rather old proguard binary itself (remember: the maven-proguard-plugin is just a "starter script" for giving an independent proguard main jar file the appropriate parameters).

You'll find that on the web page of the maven-proguard-plugin there is a section which states that you can provide a different proguard version number. I thought this would solve my issues, so I followed the instructions like told and .... nothing happened. The plugin is still using the proguard version 4.3 for obfuscating code.

There has been some modularization in more artifacts:

newer versions of proguard don't seem to in the maven central repository.

Ok, proguard artifact itself is here until 4.4, then there are several other with 4.8 which is at the time of writing the most up to date proguard version.

This change of packaging may well be the reason that the described way to use another proguard version doesn't work as promised (?):

The answer would be in the source of the maven-proguard-plugin source code ("the mojo").

(As it seems there is already a patch but the proguard maven plugin isn't published yet, at least not in maven central.)

To make a long story short, this rather innocent looking project comes to the rescue. Together with following configuration it will happily use the proguard 4.8 binary, at least it worked for me.


<build>
 <plugin>
    <groupId>com.github.wvengen</groupId>
    <artifactId>proguard-maven-plugin</artifactId>
    <version>2.0.5</version>

    <dependencies>
       <dependency>
           <groupId>net.sf.proguard</groupId>
           <artifactId>proguard-base</artifactId>
           <version>4.8</version>
           <scope>runtime</scope>
       </dependency>
    </dependencies>

    <executions>
       <execution>
         <phase>package</phase>
         <goals>
            <goal>proguard</goal>
         </goals>
       </execution>
    </executions>
    <configuration>
      <proguardVersion>4.8</proguardVersion>
       .... <!-- your configuration goes here -->
    </configuration>
 </plugin>
</build>

Pay attention to the different artifact id of the proguard binary. (check also the patch mentioned above).