Showing posts with label opencv. Show all posts

Monday, May 11, 2020

Webcam Image Stream with JavaCV

JavaCV?

JavaCV is a very cool library which empowers Java users to access native libraries like OpenCV or FFmpeg and many others.

Among other things, it prepackages OpenCV with maven, as such you can jumpstart in OpenCV development in mere minutes. Even if it downloads the internet without special tuning, it is as far as I know the simplest and fastest way to try out computer vision algorithms on the Java platform.

As a bonus, it enables also writing applications for Android, not to mention the usual desktop platforms like Windows / Mac and Linux.

In the past I've created some applications using OpenCV and it's official Java API, which is also available via JavaCV as far as I know. But JavaCV additionally provides API's which give you an added value as it makes using OpenCV APIs more idiomatic for a Java user, which is always a good thing for adoption.

In short, you save some time setting up your system if you just decide to use JavaCV.

Motivation

The motivation for devoting some time to JavaCV was to see if I could take advantage of the new PixelBuffer API which can use since JavaFX13 native arrays directly.

It seems clear that this should boost performance considerably and improves framerates for applications like my SudokuFX project. I've created a proof of concept  which compares different ways of using a webcam image stream based on the OpenCV stack.

In this project there are three implementations given:
  • a swing based, officially endorsed way to show a webcam / image
  • the classic JavaFX variant
  • the DirectBuffer approach
I've measured how fast each approach is, and like expected, on my machine it turns out that the last one using JavaFX with DirectBuffer is the fastest way to show a webcam image stream.

Here is the output for running the three different versions, with the swing approach being the slowest one.

home:target lad$ java -jar javacv-webcam-2020.2-SNAPSHOT-jar-with-dependencies.jar 
Mean: 719434
Mean: 628738
Mean: 601112
Mean: 579823
Mean: 565205
Mean: 552922

home:target lad$ java -jar javacv-webcam-2020.2-SNAPSHOT-jar-with-dependencies.jar classic
Mean: 9508516
Mean: 9461551
Mean: 9423204
Mean: 9419029
Mean: 9415144

home:target lad$ java -jar javacv-webcam-2020.2-SNAPSHOT-jar-with-dependencies.jar swing  
Mean: 35786482
Mean: 35410293
Mean: 35220229
Mean: 35092391
Mean: 35030641

Above numbers say that DirectBuffer approach is the way to go, no discussion about that! I didn't measure CPU load or memory behaviour, but I'm sure those numbers are better as well.

Conclusion

If you are using OpenCV and JavaFX, you should definitely give JavaCV and its enhanced API's for OpenCV a try.

Check out the source code for this blog post on github.

I would like to thank Samuel Audet who does a great job maintaining JavaCV and who also helped me get my webcam image to fit to JavaFX's PixelBuffer.

Version 2020.3.0 of javacv-webcam uses the same techniques, but is implemented in 100% Java. Check it out. 

Sunday, April 19, 2020

SudokuFx revisited

This blog post covers my lazy sunday afternoon where I tried to get my ancient Sudoku project running again.

screen capture of application
(If you wonder why those numbers dance around - depending on what the application recognises different solutions are calculated and presented ... yes it's not perfect ;-) )

Years ago I played around with the idea of solving Sudokus with an algorithm and used JavaFX and OpenCV to do it. Quite an unusual combination, then as it is now - but it wasn't really a bad experience at all. In my view the Java OpenCV API is quite usable, and as such I wanted to prove at least for me that I could get it to run (albeit its far from perfect ;-))

I remember spending hours playing around with different filters and effects, always proud of new things I discovered.

Today, I decided to breathe life again into this project, let's see which problems I'll encounter.

First, getting source code from github still works, my last commit already 4 years ago, zero contributors along all those years, that's what a normal OSS project looks like ;-).

I try to revive it again, just the desktop version of it, leaving the android version on my todo list.

First obstacle I hit is to compile it, OpenCV is missing on my system. OpenCV doesn't have a proper maven integration, there is an ancient issue about this, nobody had the mood or skills to solve it yet. 

Update: I learned that there is somekind of maven integration in the meantime! Great!! Anyway, I build OpenCV from scratch for this article, maybe I'll have a go at the maven build another time.

Step 1 - download and compile OpenCV 4.3.0


First, I want to mention that there are several package mangers which provide prebuilt binaries for OpenCV, homebrew for example. It may well be that this is an option you prefer If you stumbled on this page by googling (seems to be rather unlikely but well).

Ok, in the meantime they reached version 4.3.0 something, I download the zip from here but I'm too dumb to find build instructions ...  No obvious links are neither on the main page nor documentation. (They surely exist but I just didn't see them apparently)

Finally, I found them.


There are numerous steps to follow, you'll need Cmake and quite some time during compilation, educated guesses what to choose, we'll go with defaults for the first try. Unzip it somewhere, I choose

~/custom-builds/opencv-4.3.0/src/ 

since we have the famous 'out of source' build CMake proposes as best practice. This means that there is a dedicated directory for build artifacts.

As such I choose following setup:

~/custom-builds/opencv-3.4.0/src/<actual contents of zip>
~/custom-builds/opencv-3.4.0/target/<here build artefacts will be placed>

I jump to this target directory and execute there following command:

cmake ../src/

... then CMake does it's job, checks for all available goodies found on my system, I pray that the right ones I need are contained, otherwise I will have to configure it and fight the dragons of OpenCV ... again.

... But it seems that I'm lucky, at the end of the cmake output it says something about java bindings, which I'm interested in, as such it should compile it like I want.

What I personally don't want is that it installs itself to some system directory, which will definitely pollute my system and break some stuff already fine tuned there, as such I have to Issue CMake again with a proper parameter:

cmake ../src -DCMAKE_INSTALL_PREFIX=../out

(Pro tip: delete your target directory beforehand completely, thank me later). This would put OpenCv then to a directory:

~/custom-builds/opencv-3.4.0/out/

Like that I can delete it again without any trace.

I'm quite sure I don't need 98% what is going to be compiled, and some magic incantation of CMake or it's configuration would prevent compiling and linking it, but I don't want to go down that road, not today.

After configuring CMake you have to invoke 'make' as well, and do it with full throttle, meaning with some concurrent threads to speed things up (yes, you can get your coffee break since it will take a while).

That said, still being in the target directory, now execute

make -j8

which will use 8 threads to compile OpenCV (takes 5min+ on my machine)

In the meantime, I want to mention it is a huge accomplishment that building from scratch 'just works' for many environments, be it MacOsX, Windows, Linux ... this is much work and should be praised!

Everytime I compile something I'm amazed if it works first time without much hassle.... I've spent already countless hours on resolving build problems, it is a major time drain.

Anyhow, make succeeded, and all build outputs are already somewhere lying in the target dir. But with

make install

everything important for the runtime will be put to the ../out directory.

Specifically, one can find dylibs in the out/lib and out/share/java/opencv4 directory.

Step 2 - Make OpenCV available to Maven


I tried to make this easy, all you have to do is to edit the main pom file and tweak some properties and point to your opencv installation directories. Here is an example configuration:


    <properties>
        <project.build.sourceEncoding>UTF-8</project.build.sourceEncoding>
        <scala.major.version>2.12</scala.major.version>
        <scala.full.version>${scala.major.version}.10</scala.full.version>
        <opencv.major.version>4.3</opencv.major.version>
        <opencv.full.version>${opencv.major.version}.0</opencv.full.version>
        <opencv.install.path>/Users/lad/custom-builds/opencv-4.3.0/out/</opencv.install.path>
        <opencv.java.jar>${opencv.install.path}share/java/opencv4/opencv-430.jar</opencv.java.jar>
    </properties>

After you've changed those settings to your liking, enter following command:

mvn initialize -Pinstall-opencv -N 

Now you should be ready to go, build the project with

mvn package

It shouldn't take too long, and everything should be set up correctly. OpenCV has many dylibs / dlls, which are referenced in this project, but via maven property filtering and some pseudo magic everything should just work.

You can fire it up via (being in the main directory of the project)

java -jar sudoku-javafx/target/sudoku-javafx-2020.1-SNAPSHOT-jar-with-dependencies.jar

A JavaFx Gui should appear, on the first invocation you maybe have to tell your Os that it is ok to give SudokuFx access to the webcam.

I've blogged about this project in several other blogposts, maybe you want to read them as well.

This post is referencing code state from the 2020.1 resurrection release.

To sum up, compiling OpenCV turned out to be much easier now as it was years ago, only my code was a little bitrotten - still is - but at least it should be easier to get it to run now than it was before this little article.

Thanks for reading!

Wednesday, January 6, 2016

Encapsulate OpenCV 3.1 as Android AAR

In this post I describe how to encapsulate OpenCV as an Android AAR package such that it is easier to include it as a maven dependency.

[High Street, Guildford, England]  (LOC)


Disclaimer: Apparently there exist many other tutorials about OpenCV, my approach is a little bit unconventional. I also have to mention that there is a very well maintained library called JavaCV which does essentially the same.

The motivation for this blog post is that I want to have an convenient way to use OpenCV with my Android applications. Below I describe what I had to do to achieve this.

Step 1: Download the OpenCV library


On www.opencv.org there is a link to download the library for Android. Download it, unpack it.

If you've followed the post about compiling OpenCV yourself, you already have a directory in your
homedirectory somewhere:

opencv/
opencv/opencv-3.1/
opencv/build/

now, add the unpacked Android SDK:

opencv/
opencv/opencv-3.1/
opencv/build/
opencv/OpenCV-android-sdk-3/

You'll find the usual suspects in the directory, some samples, javadoc for the API, already pre build apk's:

apk/
samples/
sdk/

Now I want to discuss briefly the contents of those directories.

Directory apk: OpenCV Manager

OpenCV encourages you to use a separate application called OpenCV Manager which sole purpose is to make sure you have installed a compatible OpenCV library on your phone. This approach is fine but requires your users to install a second app on their phone. For the technical inclined this is no problem, but for end users this may seem a little bit awkward. I prefer to deliver a self contained app which has no apparent third party dependencies.

The apk directory contains this Manager application for environments where you don't want to use the OpenCV Manager from the play store.


Directory samples: OpenCV Android Samples


The samples directory contains several example apps which demonstrate various aspects of the OpenCV API for android.

./samples/example-15-puzzle.apk
./samples/example-camera-calibration.apk
./samples/example-color-blob-detection.apk
./samples/example-face-detection.apk
./samples/example-image-manipulations.apk
./samples/example-tutorial-1-camerapreview.apk
./samples/example-tutorial-2-mixedprocessing.apk
./samples/example-tutorial-3-cameracontrol.apk

I recommend to install some of the apk's on your device:

  adb install <example.apk>

This is the best way to get a feeling what can be done with the OpenCV Android API, so I suggest to play around with the samples. The source code for those samples is also included.

Directory sdk: Android OpenCV Java API

Here you'll find what you will need for your own app. There are  pre-built android libraries for various architectures and one java API to use the native code. The directory structure you'll find on the top of this directory looks like follows:

etc/ ... some configuration for special routines you could use 
java/ ... the java glue code you will program against
native/ ... prebuilt binaries for the android platform

Since I use maven for most of my projects and all of my open source stuff, I need some way to use the provided java glue code and the binaries in my projects. As long as you just use the default API for OpenCV, you can take the code provided almost off the shelf.

Create an OpenCV AAR ready to use with Maven

The following approach shows how you can create a maven module containing the OpenCV bindings - thanks to the android-maven-plugin it can then be used like a 'normal' maven dependency. The plugin will take care about including the AAR in the final APK, you just have to declare it as a dependency (see below).

For this to happen, I've restructured the source code in the following way:

Restructuring of the sdk subfolder
This is the default structure which works together with the android-maven-plugin and includes only code and binaries you'll need at runtime. The pom looks as follows:

pom.xml for an opencv aar

You can see that I'm referring to the standard android api of a certain version - this is needed in order to properly compile the OpenCV Java API.

In order to get the standard android api, you have to clone yet another project named maven-android-sdk-deployer and install the proper API level in your local maven repository. This can be done for
example by issuing following command:

mvn install -P 5.0

A prerequisite for this command to finish successfully is however that you have already installed the Android SDK itself.

Hint: It seems that the OpenCV 3.1 bindings for Android need at least API level 21, maybe you save some time by just downloading this API Level.

Anyway, if you look closely at the pom.xml you'll notice it is using a custom packaging method, namely 'aar' - this is possible since the android-maven-plugin provides the capabilities for maven to properly create such a file type.

Aar's are bundles which contain libraries (Java code, resources or native code) ready to use in Android Applications. Luckily, android-maven-plugin makes it possible to use aar's like normal maven dependencies.

By using this approach you can deploy the OpenCV bindings in your maven repository. OpenCV can then be treated like any other maven dependency, which is a nice thing.

To recap:

After a successful deploy or local install of this maven module (with mvn install) all you need is to include it in the dependency list of your main app, just like shown below:

dependency declaration for your homebrew opencv maven module

That's all there is to it - you should be able now to use OpenCV in your project. Of course, the maven coordinates change depending on which you've chosen before.

One nice aspect is that the download of the OpenCV Manager is not needed anymore. The drawback is of course that your apk is getting bigger - nothing comes without a price.

For a complete example have a look at the SudokuFX project. Thanks for reading.


Wednesday, December 23, 2015

OpenCV 3.1 with Java Support on OsX El Capitan V10.11.1

In this blog post I'll describe what you have to do in order to build OpenCV 3.1 with Java Support on a Mac with El Capitan.

Painting the tanker 'Borgsten'


(If you don't want to do source builds and you don't have all necessary tools installed, there are also some alternatives like brew or macports available. In fact, I blogged about using this approach some years ago.)

Compiling OpenCV 3.1


First, you will have to download the sources directly from the official opencv.org site. It is a rather large source distribution, so the download may take a while.

Unpack the source ball into a directory, I did it like this:

~/opencv/ (1)
~/opencv/opencv-3.1.0/ (2)

I created a directory named "build"

~/opencv/build/ (3)

(1) ... a directory which includes all opencv versions, so you have everything in place if you want to follow more than one version and you don't use git for doing this
(2) ... the sources like you've downloaded them
(3) ... the build directory which will be cluttered up by cmake with all kinds of stuff

Change to the directory (3) and issue following command:

cmake ../opencv-3.1.0/

This command will investigate what is already installed on your system. It will do its best to download stuff it will need to compile what is possible. Certain tools or libraries you still need to download manually, though. This command will finish in a minute and end with a thorough report of how the build is configured. Check this list and see if your feature is configured aswell. To my surprise and as opposed to the last try with version 2.4.6 the java bindings are activated per default which is great. Huge thanks for the build guys of this library.

The cmake command is setup in a way that in theory you just have to invoke another command, named

make

which will invoke by itself all programs which contribute to the final build artifacts. This means it will invoke c++ compilers, c compilers, helper programs and whatnot. This command will also take some time to complete.

After waiting for some minutes the command exits successfully and in the bin folder there is a jar file which contains all bindings to the opencv library. This API is then the entrance for using the excellent library from your Java applications.

Using OpenCV 3.1.0 with Maven


After having compiled opencv like described above, several directories and files had been created. Amongst those, in the 'bin' folder, there is a file called

opencv-310.jar

This jar file can be installed in the local maven repository like this:

mvn install:install-file 
       -Dfile=opencv-310.jar 
    -DgroupId=org.opencv 
 -DartifactId=opencv-java 
    -Dversion=3.1.0 
  -Dpackaging=jar

From now on you should be able to reference the library with maven in the pom.xml like this:

<dependency>
  <groupId>org.opencv</groupId>
  <artifactId>opencv-java</artifactId>
  <version>3.1.0</version>
</dependency>

Still, in order to get OpenCV to work, you'll need the native part of the library which contains "the real thing" - the Java code is just a thin wrapper which makes it more convenient to call the native code. Those files are generated in the "lib" folder:

libopencv_objdetect.3.1.0.dylib
libopencv_calib3d.3.1.0.dylib
libopencv_objdetect.3.1.dylib
libopencv_calib3d.3.1.dylib
...

One of them is called "libopencv_java310.so" - this library contains the native code for the api which is accessible through the jar file. Make sure this library is loaded before you call the first time into the jar file via 

System.load(new File("/path/to/libopencv_java310.so"))

This should help you start developing against the OpenCV API with Java and MacOsX.

It may happen however, like mentioned, that you will need to install additional software packages such that the compilation step of OpenCV is successful for you.

Sunday, June 21, 2015

Sudoku Capturer Release 1.6

Sudoku Capturer presents itself now as a self contained app, without the need of OpenCV Manager as a separate download.

Carter Buton Album Loan_00115
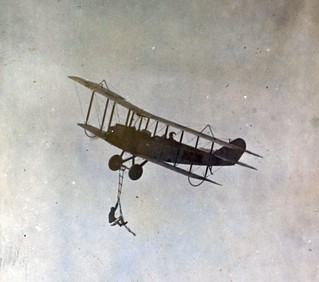
From a album belonging to barnstormer/daredevil Carter Buton.

I've decided to use the possibility to integrate OpenCV as a native library without the OpenCV Manager functionality since it improves dramatically the user experience for the application.

Many people had been asking themselves why a "third party" dependency had to be installed for the Sudoku Capturer application, and thus I've decided to go the "deprecated" road and link the OpenCV libraries "statically".

In retrospect I should have done this much earlier, since I've learned that I don't have to include every static lib which is offered by OpenCV, I get away with only a subset of those libraries, and the download is in sum even smaller than with the OpenCV Manager.

Since OpenCV is the only native library I need it suffices to copy the libs to the appropriate place and thankfully the android maven plugin does the rest. Sudoku Capturer supports with armeabi-v7a architecture.

About Sudoku Capturer


Sudoku Capturer is an app to solve Sudokus by using your mobile phone camera. The app uses OpenCV and and Scala, and runs on Android. Furthermore a testbed exists which targets JavaFX on the desktop which makes the development process and debugging of the image processing part much more practical than the typical mobile development workflow would ever permit. The whole source code is hosted on GitHub and can be used for your own experiments.


Saturday, May 17, 2014

Sudoku Capturer 1.4

Today I released a new version of my Sudoku solver app for Android.

Sudoku Capturer 1.4 with incremental number detection

From a user perspective, the most prominent new feature is that the app now shows incremental progress of the numbers which were recognized successfully. This fixes one of the biggest problem with the approach the application had before - numbers which were identified erroneously and which led to a deadlock in the solving algorithm itself.

Currently, on each frame the application makes a quick sanity check if a number would violate the basic rules of the sudoku game - that is to say if at a given cell for example the number seven would be identified, the application now checks if there is already a seven in the same row, column or section. If yes, the whole Sudoku is rendered invalid and the detection algorithm starts from scratch.

In older versions of the application, only one frame of the video stream would be the input for the solving algorithm, which frequently led to non terminating behavior of the solving algorithm itself.

The application is now counting how often a certain number is recognized for a given cell, and after hitting a certain threshold the probability that the detection was correct is certainly higher than without using this simple strategy.

Furthermore, if the Sudoku Capturer app is not able to build up a library of all number from 1 to 9 it paints the number with a internal font - this should happen only very rarely, though.

Give it a try on on your android device, I would be interested in your feedback.

You can download the Sudoku Capturer application in the play store:

Thursday, October 31, 2013

DevFest Vienna 2013

Not long ago I had the opportunity to present my Sudoku2go project at the DevFest Vienna 2013, which was recorded and is available on Youtube.


I switch to english after the introduction, so skip the first minutes.

Among other things I present the basics to build a JavaFX application, show how easy it is to create user interfaces with Scene Builder, how to connect a native library (OpenCV) with the Java ecosystem, and above all how to use Scala to glue it all together.

The code is available on github, and on this blog there are several entries which describe certain aspects of the application.

Thanks +DevFest Vienna for giving me the opportunity to present the project :)

Sunday, September 22, 2013

Color Extractor

While almost all of my JavaFX friends are somewhere in SF attending a small, unknown Java conference I have refined the code of the Color Extractor application (formerly known as HSV Adjuster). ;-)

Here is a screencast showing the application in action:


Here is a screenshot:


In short, the application now combines the input signal with the HSV mask you can create using the three sliders. The application writes this information into the alpha channel of the input image stream, resulting in pictures like above.

The neat thing is that the image stream is taken from your webcam, and thus it is an interactive way to explore the effects of different settings.

This solves also the greatest shortcoming of the HSV Adjuster application, which didn't yet combine the alpha information with the input image but only showed the alpha channel in black and white. The latter has its own aesthetic appeal, but I think the color extractor application better shows the original intend I had.

Implementation Notes:


The application is written in Scala, the GUI Frontend was done in JavaFX and the image processing works with OpenCV by using its Java bindings. OpenCV can split each color channel (RGB) and combine it with alpha channel information (see the alphaBlend method in the source code below).

The conversion of OpenCV Mat data to images which can be displayed by ImageView components is done by the toImage function - in contrast to earlier versions of my Webcam API layer I'm using the approach discussed here - this optimization speeds up the application considerably.


Source code of the application is available here. Below you can find the source of the main application for fast reference.

Guys, I wish you a nice time in SF and hope we'll see stunning new work for the JVM platform.


Saturday, August 24, 2013

HSV Adjuster - interactive HSV colorspace application

The application I'm describing in this blog post can help you determining HSV values for objects you show to your webcam.

Here is a video:


Here is a screenshot:

screenshot of the application

Here is complete the source, lookup apps/hsvadjuster/ application.

Maybe you take the time to read a little about HSV in the wikipedia.

This application uses b103 of the early access release of JDK8 and additionally the controlsFX library written by the fxexperience team. The widget I'm using is called RangeSlider.

This time I've used fxml, if you want to use widgets like the RangeSlider don't forget to import them in the header instructions.

This post was very heavily inspired by a blog post on object detection using color separation for C++. Thanks for sharing. There you can find how to use the application to find proper lower and upper bounds for your light conditions and target colors.

For reference, I've created a gist to quickly browse through the key parts of the code:


Sunday, July 14, 2013

Sudoku Grabber and Solver - Part II

In this blog post I want to continue the work on the sudoku solver and use my webcam to grab the sudokus and show the solution right away in the grabbed picture.

Here is a video of a recent version of the application:


This video is in black and white from an earlier version:


And here is a screenshot:


Augmented reality display of a newspaper sudoku


What happened in addition to the last posting on the sudoku2go program is the following:


grabbed images of digits are reused when showing the solution


I thought it would be a nice idea to reuse the digits already available to show the solution. Like that there is no mismatch between the original font used and the fields which are to be filled in. In the screenshot above you can verify that the result really looks as if a solved sudoku was printed (well sort of ;-) )

live grabbing from a continuous stream of pictures


When showing the application to friends this was almost always the first question - here is the newspaper with the sudoku, now solve it! I've added a webcam functionality to the program (reusing code from my isight-java webcam project) which gives an immediate feedback to the user.

border around the whole puzzle


I thought some colored border would provide a better feedback to the user. Using JavaFX for painting such a border is far more powerful and less of a hassle than to use OpenCV's possibilities. Like that you get effects like DropShadow for free.

overlay of the solution on the original input image


Maybe you have a look into the source how I create the sudoku solution by reusing a digit "library" of grabbed images. I'm using JavaFX and its screenshot API to create a picture which then is "rewarped" again by openCV to fit in the original image. This could be improved by just using openCV's Mat class I suppose, which has to be faster, too. Anyway, the "blendMode" feature of JavaFX saved me much (development) time. ;-)


Improved speed


I've measured the performance bottlenecks of the sudoku program, and found some places to be optimized. Specifically I've introduced Scala Futures in order to decide which cell contains which digit (or no digit). After segmentation this is a nice example to apply parallel computation and it turns out this speeds up things considerably. Like this you get a parallel computation of your subtasks, and collect them as they finish.


Ideas to improve the application


Anyway, in its current state the program does what I originally wanted from it - show the webcam the newspaper, you get the solution back right away in augmented reality. As always, there are many ways to improve the application - for example a more intelligent way to recognize the digits, a more responsive ui, using an approach which reuses information collected in the past for the current measurement,  etc... maybe you want to fork the project and give it a spin?


Saturday, July 6, 2013

Sudoku Grabber and Solver using OpenCV, JavaFX and Scala

In this post I'll show you how to build an Application which solves a Sudoku puzzle from a o photo of a local newspaper.

First of all, here is a video of the application:


Maybe a screen shot suffices for most visitors:

OpenCV for image processing,  JavaFX for visualization and Scala as the driving force

Ok. Fine. Source Code!


Click here for the complete source code. Make sure you have openCV installed however and change the path of the native libraries matching your setup. At the moment you have to start it from your IDE.

Why a sudoku program?


My main motivation to create the program was to explore the possibilities openCV offers a little more in detail, and tackle a non trivial (of course "non triviality" always lies in the eye of the beholder) problem with it. As it turned out there are many blog postings around which describe how one could recognize the digits and their position and as such the whole sudoku puzzle. Nevertheless it was a pleasant experience to implement it on my own. (Disclaimer: Needless to say I would have been totally lost without reading all available online resources, browsing through blogs and books, trying out stuff and redoing it all over ... )

Anyway, when creating such a program, you have two major challenges:

  • Image recognition
  • Solve the sudoku problem itself

I was more interested in the image processing domain since it was apparent to me that the solving algorithm is a very deep snake pit. But more on that later.

How to squeeze out digits out of an image?


It turns out that it is relatively easy to do this with openCV. The main idea is that every sudoku is surrounded by a border and the sudoku is defined by a 9x9 matrix of squares containing the digits. As such, the first task is to identify the borders of the sudoku. It goes without saying that everything else on the input image should be ignored, only the sudoku remains as a region of interest. Furthermore you know in advance what you want to extract out of the photo - you want to know which square at which position contains a number or not, and you want to determine the number.

There are several preprocessing steps involved such that it is easier for the openCV algorithms to detect the borders properly. The idea is that the surrounding borders define the rectangle with the biggest area on the photo, which is a valid assumption if you create such a program. Concerning the recognition of the digits there exist several approaches like using a neural network or even a pre-made library like tesseract for doing this tasks. Tesseract is surely the choice to be made if you want to have a robust ocr engine, there exist also java bindings for it, I didn't try it out though.

Another approach, and maybe the simplest one, is template matching.

Image preprocessing


In order to filter out stuff we don't need for digit recognition, we apply certain preprocessing steps, which are shown in the screenshot below:


This is fairly self explanatory (and the implementations of the called functions are one liners calling some OpenCV library functions).

Finding the contour with maximum area


The result of this preprocessing step will be examined in order to find the shape with 4 sides with the maximal area.


Here you can see the power of Scala collections applied by filtering out only shapes with 4 sides and choosing the one with the biggest area. The result already contains the 4 points which define the sudoku borders.

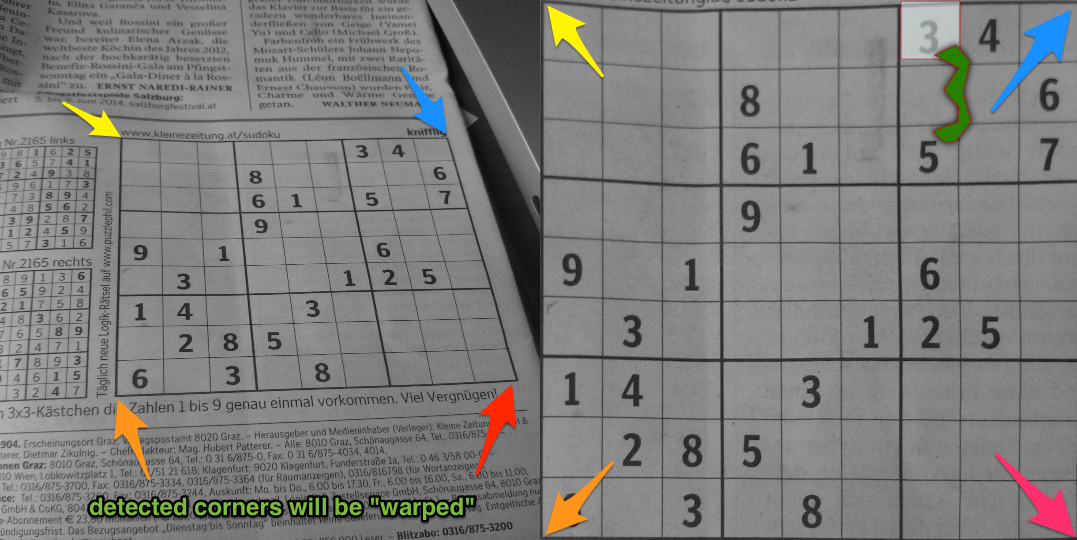
Now the situation already turns out to be quite a good one: we know the corner points of our sudoku, but it still is placed somehow on the photo, we have to "normalize" it to be able to do template matching. OpenCV comes to the rescue, it has a function called "warpperspective" which does exactly what we want and is one very important aspect of the whole approach.


On the right side you'll see the sudoku which serves as an input for the next stage, detecting the numbers.

Detecting numbers


I made myself my life very easy by just dividing the resulting Mat from the previous warp step to be a 9x9 matrix. All cells are inspected separately and thus the problem is reduced to detect one number in one cell.

The contour with the biggest area will be searched in a subarea of the cell (in order not to have false positives with a sudoku line which quite often interferes here). Another assumption is here that the contour must contain the center of the sudoku square. With those two assumptions we get quite reliably the contours we are interested in.

Like this we get a list of contours which have to be matched against a template library. We have to make sure that the detected contour is normalized in order to properly compare it with our templates.

OpenCV has everything one needs for such an operation. In essence you need to compare two lists of points which each other and calculate the minimal distance between reference lists (associated with a number) and the list in question. The main problem is that you don't know how many points there are in the list you investigate, and as such the trouble starts. Here it is important to know which functionality is already available in the library, and which glue code between the calls to the library still have to be custom made.

I am sure that wheels get reinvented all the time - so make sure to double check before implementing a too low level concept in your code. (I would not be surprised if some steps in this small project are also superfluous)

I designed the program in a way that the detection method can be exchanged, above you see the approach using template matching. A set of reference images is compared to the slices picked out by all operations described above, and at the end we assume the best match is good enough and return the number associated with the template match.

Here is an example for some templates to match against:


You can see that I've choosen templates which aren't perfect either - the reasoning behind this is some kind of "fuzziness" in the matching should be possible. Try yourself what works best for you.

Almost there

Now we have identified the cells which are empty and distinguished them from the cells containing numbers. We are were most sudoku solver start anyway - the definition of the puzzle in some form of an array.

Assuming you have a function which knows how to solve such a puzzle it is easy to show the user the solution of the puzzle. There are some very nice thoughts about a sudoku solving algorithm online, make sure you check it out. I took somewhat of a shortcut and used following approach:

complete Sudoku solving algorithm

This is the first google hit for "scala sudoku solver" with small adaptions to fit into my program.

The output gets translated to JavaFX Labels which are shown when pressed on the "solve" button.

Ah. Great. What about this bumping effect??


You may have noticed in the video that the contour visualization bumps up and down when selected - I thought it would be nice to have such a thing in the program to make it a little bit more attractive. The contours are the shapes which are detected by openCV.

I googled for "bounce JavaFX" and stumbled upon this project, i've extracted the parts I needed and was astonished that there is not more code necessary for such an effect. In short, you just need to define the keyframes of the animation, and the rest is done by JavaFX.

Conclusion


To sum up, it was again a nice experience writing the program with my favorite toolchain. I'm very pleased about how well JavaFX and openCV can work together,  especially if you use JavaFX for visualization and UI and let openCV do the core processing tasks, and let Scala be mediator between those two great libraries.

Anyway, I only scratched (again) the surface of all involved technologies, I'm sure that the integration of openCV with Scala for example could be improved a lot by creating a DSL on top of the available Java bindings. Some implicits would do the job, too - sometimes it is a little tedious to convert MatOfFoo to List[Foo] - applying here a little scala magic would declutter the API a lot.

Nevertheless already in their current state all three technologies can be considered - when used together - as a very powerful platform for creating image processing applications.

Update

Maybe you want to check out Part II of the Sudoku2go blog post series.

Monday, May 13, 2013

2D Image Filters with OpenCV

In this blog post I'm giving you an example on how to do basic 2D image filtering using OpenCV and displaying the result instantly using JavaFX.


Image filtering means that you apply various transformations on a given image. Of course, image processing is math, and I'll assume since you stumbled by this blog you are familiar with the basic concepts of image processing - if not there are plenty of articles in the web which can give you a good overview. Wikipedia will always give you a broader view on the topic.

Like you've noticed in the past few posts on this blog I'm making myself familiar with the OpenCV library, and the best way to learn a new API is of course to read whats available and make your own experiments. In my case, I've made a JavaFX application which makes it easy to explore the different effects you can achieve by changing the kernel values and getting instant feedback.

Warning: This blog post is just about very basic filtering, and chances are high that some of the operations deriving from parameterizing the kernels have their own names and/or have more efficient implementations in OpenCV.

As a sidenote, if you don't already know Bret Victors talk on 'inventing on principle' you should definitely visit his web site. I've tried to make the program given below in a way that the user can experiment and maybe get new ideas about the whole problem, invent their own kernel for example. It's fun to change some values here and there ...

Like this you get an idea what's behind words like 'blurring' or 'sharpening', and find out that "finding edges" means nothing more than apply simple yet powerful mathematical operations on an 2D matrix.

I have provided some example kernels along with the application to give you some starting points - but feel free to explore the effects. Check out this page for an explanation of the used kernels in the application.

Another motivation for this blog post is to explore the feasibility of using Scala along with OpenCV and - I'm biased - I find it a very good match. Even more so if you use JavaFX to implement the GUI.

Below is the code, this is all you need for the video above. (yes - I've discovered iMovie! ;-) ).


Sunday, May 5, 2013

Using Scala Futures and OpenCV together with JavaFX

In this post I want to show you how you can improve the performance of your application by using datastructures and approaches which make use of non blocking parallelism.

Girls skipping at an athletics carnival

Recently I digged into the API's of OpenCV, which is a great image processing library. I wrote several blog posts about it, and this is sort of a follow up on these posts. However, this time I want to improve the project by introducing Scala Futures into the codebase. (Why? because its there!)

Scala Futures are an integral part of Scala 2.10 and are explained here in more detail. I want to show you how the readability of applications can benefit - as well as their performance. The latter will be more important for your managers, but using Futures combined with Scala's for comprehension have their own aesthetic appeal.

If you compare the isight-java project from this and this commit, you'll find that not very much changed for the end user, in fact it is more or less the same end user experience. However the version I'm describing here makes heavy use of the 'Futures' concept.

In short, the application is based on a filtering pipeline, starting on the grabbed image several different algorithms are applied to it, passing and mutating the Mat datastructure from one operation to the other.


Using Scala Futures and for comprehension, this translates to a code like this:


You'll recognize the pipeline structure in the code above. The neat thing is that you'll get error handling for free using the recover combinator. If you compare the code above with the one of the previous post, you'll notice that it looks much clearer and the intention of the code is really apparent. (even though IMO the last version wasn't too bad either :))

Of course, the image processing functions needed some adaptions to return futures:

You can see that using futures is quite easy and feels somewhat natural when you combine it with the for comprehensions. For a more detailed discussion on what happens under the covers, please read the article on futures on scala-lang.org.

Disclaimer: I've mixed up some concepts of the Scala libraries and JavaFX parallelism (I'm using JavaFX's  Service and Task concepts along with Scala Futures) - some may argue that this is not necessary or even dangerous. Quoting this guy hereTMTOWTDI. Be aware that mixing different approaches of parallelism can lead to confusion of the poor guy inheriting your code, or may result in unwanted effects (?). One side effect I noted when using Scala Futures was the necessity to use the Platform.runLater( ... ) trick to make sure the image service runs on the gui thread.

Anyway, if you go that road with Scala Futures, with small tweaks to the source code (at least on the surface) you'll get a parallelized version which, when used in conjunction with the for comprehension, looks like a sequential code.

If your result consists of several, independent sub problems which you combine in a final step you'll get the best results when parallelizing your app.

Even if in this application this is not the case, I've nevertheless noticed a considerable improvement in responsiveness and speed (whatever reasons this had: either wishful thinking or just bad implementation beforehand ;-) ) as well as readability of the code.

It could well be that the guys over at the scalaFX camp have done something to use concurrency as convenient as the scala team did for scala futures - if not: this would be a great idea.

me blurred beyond recognition
Check out the full source code for this blog post here.

In the meantime, I wrote a new post about using your webcam with JavaCV, maybe this interests you as well?

Wednesday, May 1, 2013

Use your webcam with JavaFX and OpenCV - Part III

In this blog post I want to show you how you can use your webcam to grab pictures and build a GUI using JavaFX to show the video stream filtered by OpenCV algorithms.

Prototype Metro Cars - Birmingham Factory

Starting with the application I've developed for the last post I've added several new features to it, which I'm going to explain here.

First, I've added two sliders to the application which control the width and height of the image. There are pre - made controls for that (Slider) which are quite easy to use. Combining those with a BorderPane you already get what you need to create functional UI.

On the openCV side, we just need to slice the grabbed Mat data structure with Range objects, and thats it. It is interesting to see the difference in speed (and thus, how fast openCV and your webcam can provide data) when changing the size of the grabbed image.


Here is the source for the application shown above.

Converting an image taken from the webcam  to grayscale using OpenCV and Java


You all know that pictures of yourself look better if you do it in grayscale. This is easy to accomplish using openCV, since there is the very handy Imgproc class which provides several nice static methods like Imgproc.cvtColor(...).

Once again, this method operates on the Mat datastructure:

So far, we've pretty much completed the same like  this introductory tutorial here using JavaFX and Scala. Here is the commit for further reference.

... then some days later ...

I've overhauled the code and made it more interesting also seen from the Scala and the JavaFX point of view. Furthermore I've introduced a feature to blur the captured image as another example for using the OpenCV API using the Java bindings. I tried to group the code in different traits so you can quickly reuse them if you find them useful.

Here is a screenshot of the main program logic which uses all parts:


The following code shows how to create a combobox containing custom objects using the helper functions introduced in the small project:


Using the approach to put everything needed to build a combobox into its own scope makes the code more readable since you don't have to bother with namespace pollution. Speaking of this - on the mailinglist there is also an ongoing discussion to deprecate and then remove the builders for the various visual components. I tend to create helper functions which can be parameterized:


This "mkFoo" approach helps a lot to structure your code.

Finally, you'll get a screencast of the running application showing my desktop while my webcam is filming my TV Set with airplay turned on.


The source code for this little application is available on my github site.